Showing posts with label recipe. Show all posts

September 07, 2013

07/09/13 - Treacle tart

I have a tendency to go into kitchen shops looking for one thing and come out with several other things I didn't know I needed... This happened the other day, when I was looking for some measuring spoons as my current set needs replacing.
I couldn't find any measuring spoons but I did find a Useful Thing - a pastry rolling mat which is marked so you know how big you've rolled out your pastry! Also a thing I've been meaning to get for ages - a lemon juicing device which catches the pips so you don't get crunchy bits in your pie.

So I needed something to bake to practise using these things, and I couldn't think what to make for a while and then I remembered how good the treacle tarts looked on last year's Great British Bake Off.
Here's the recipe. It even has lemon juice in it!

It took me a few days to get around to buying the ingredients, of course. But this evening I finally tried to make one.

The rolling mat it quite good, but it's hard to tell which  line is which when you're not next to the numbers - it might have been better to have stripes than just circles. It's still good to have a flat surface big enough to roll out lots of pastry on though - I used to use a bread board. The lemon juicer got lots more juice from my lemons that my normal method of chopping in half and squeezing them by hand, but it didn't catch all the pips - perhaps I was holding it slanting downwards or something as I was at the kitchen table rather than a worktop.
So here's some pictures:

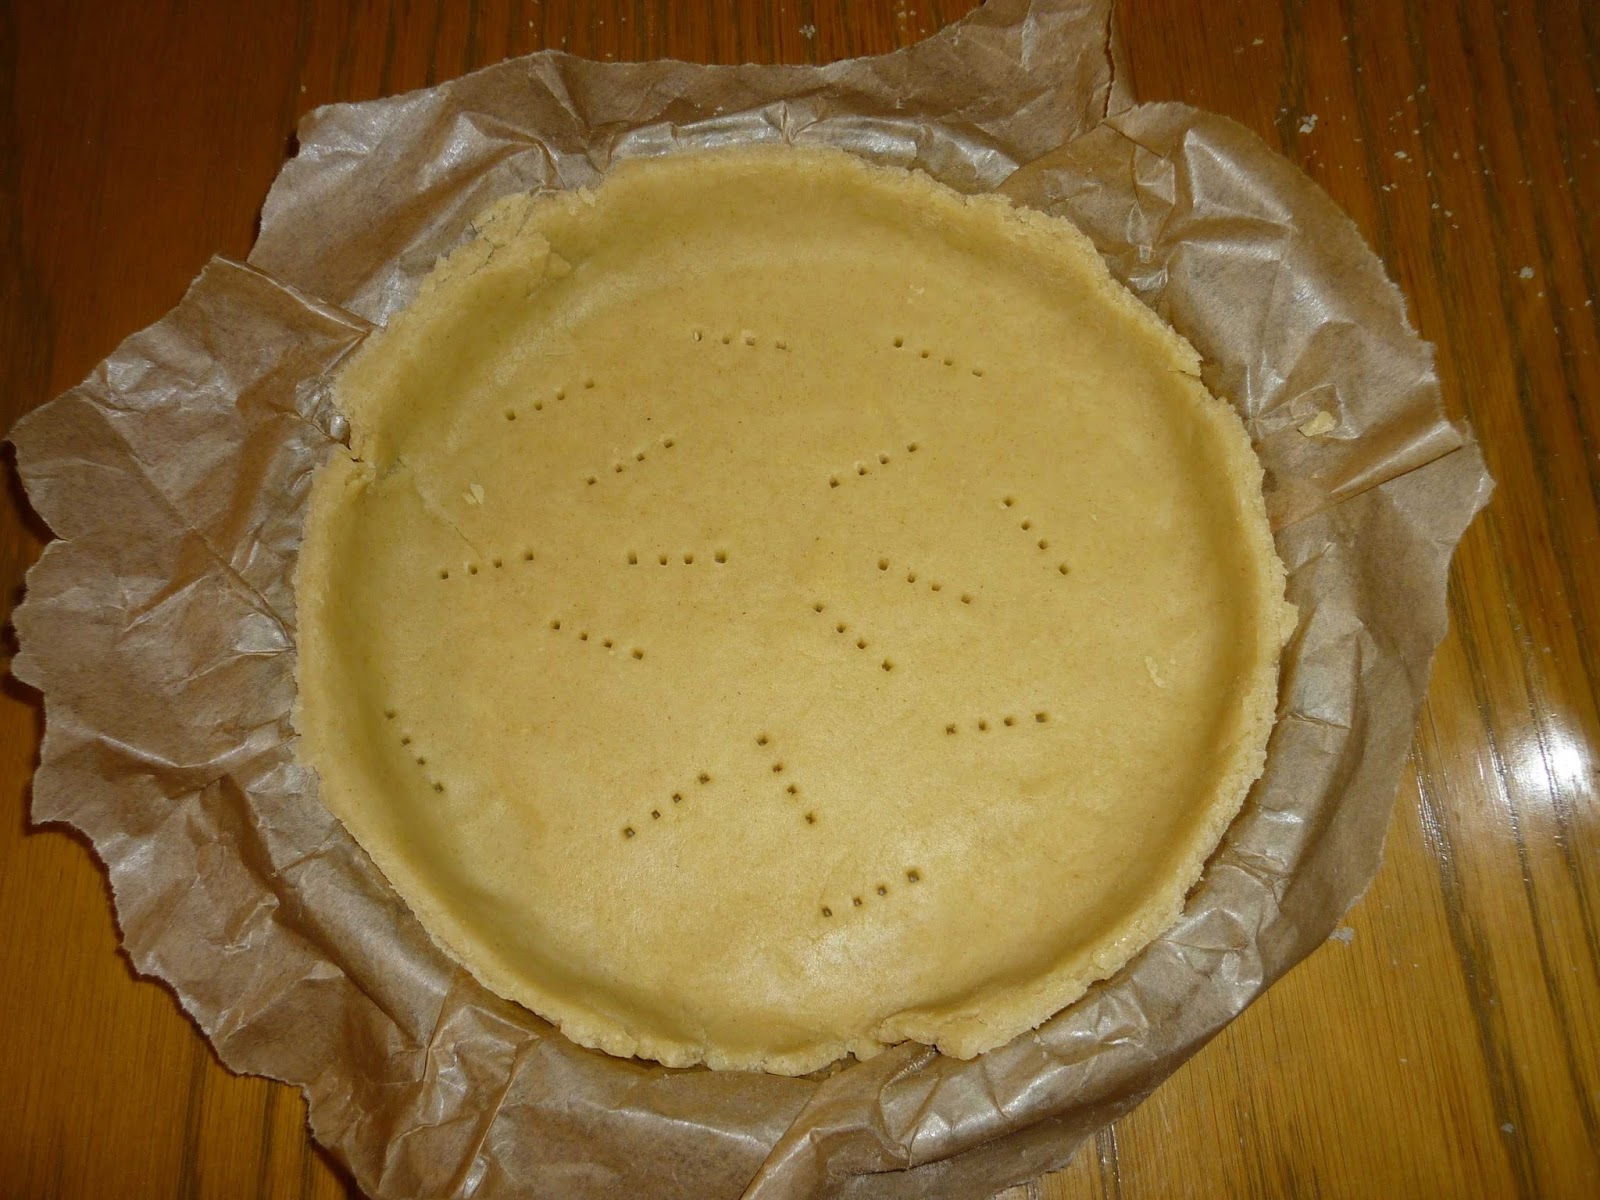
Pastry case ready for filling
Treacle mix to fill the pastry
Tart filled up to the brim!
Lattice on top 
Just out of the oven
Tasty tasty treacle tart... if I'd realised how simple the recipe was, I'd have made one ages ago.

June 09, 2013

Here's some I made earlier: the year so far in cakes

I do actually make cake more often than I write about them, because I am bad at remembering to write up my cakes. So here's a few I've made and forgotten to write about.
Start with the Christmas Cake. Okay that was really last year but I did forget to write about it!
Here in Ireland there is a bank holiday at the end of October, and I wanted to make my Christmas cake early so it could mature a bit so I decided to make it then.
The maturing didn't really work because I forgot to feed the cake but anyway I decorated it and we ate quite a lot of it (though not much got eaten on Christmas day on account of us eating too much dinner!)
Here it is:
Cake!
Closer look at the top

I decided to do a blue cake with bells and stars on it. Some of the silver dust went everywhere and the blue colouring stay on my hands for a few days but you get the general idea.

It took a while to get through the Christmas cake and all the mince pies so I didn't do much more baking till the end of January, when there was another Magic tournament to make cake for - the Gatecrash Prerelease. This cake was quite similar to the one I made in September for Return to Ravnica, except that the guild symbols were different. I don't have a picture of the finished cake, but here's one of the guild symbols all together:
 And some close ups of each guild symbol:
Boros - Red and White Orzhov - White and BlackDimir - Black and BlueSimic - Blue and GreenGruul - Green and Red
February is birthday month so I made a ginger cake (again I forgot to take a picture!)
The recipe is from one of my mum's recipe books and it's super tasty so here goes:
Ingredients
1/4 pint (150ml) milk 
1 teaspoon (5ml)bicarbonate of soda 
4 oz (100g) butter 
4 oz (100g) golden syrup 
4 oz (100g) treacle 
3 oz (75g) soft brown sugar 
1 tablespoon (15ml) orange marmalade 
4 oz (100g) self-raising flour 
4 oz (100g) wholemeal flour 
1 teaspoon (5ml) mixed spice 
2 teaspoons (10ml) ground ginger 
2 small eggs, beaten 

(Instead of the wholemeal flour you can substitute 8 oz SR flour if you don't have wholemeal)

Method
Grease and line an 8 inch (20cm) round or 7 inch (18cm) square cake tin. Pour the milk into a saucepan, add the bicarbonate of soda and heat gently until tepid. Place the butter, syrup, treacle, sugar and marmalade in another saucepan and heat gently, stirring until the ingredients are combined and the sugar dissolved. Place the flours, mixed spice,ginger and a pinch of salt in a bowl and mix together thoroughly. Stir the treacle mixture into the dry ingredients, then add the warmed milk and beat well to a smooth batter. Beat in the eggs. Pour the mixture into the prepared tin and bake in a warm oven (160°C or 325°F or Gas mark 3) for 1 hour or until a fine skewer inserted into the cake comes out clean. Allow to cool in the tin for 10 minutes then turn out onto a wire rack to cool completely and remove the greaseproof paper.

Helpful notes from my mum on the method:
I mix the dry stuff first, then start the treacle mixture on the stove, then do the milk last so it doesn't go cold - it only needs to be slightly warm, you can test with your finger. You don't want it getting too hot as not only would it take ages to cool down but would probably do something dramatic to the bicarb! The mixture will be very runny (pretty much liquid) when you pour it into the tin. I leave the greaseproof paper round to keep it in shape until it was quite cold. I remember it was quite difficult to get a good shape and sometimes the sides of cake were bit funny where there were folds of greaseproof. But it needs to be all one piece of greaseproof (i.e. not separate sides & base) otherwise runny mixture will go through gaps when you pour it in. If you've got a silicone cake tin or cake tin shaped baking parchment liners that would be much better.

As for March baking, I covered most of that in my post at Easter.

April comes round, and another Magic cake to bake - this one for the Dragon's Maze Prerelease.
I spent a while thinking about making a cake with a maze on top, but in the end I made a cake with a dragon on instead.Apparently people were disappointed that it was fruit cake. Admittedly it was a bit dry (I was using gluten free flour which apparently needs more liquid than wheat flour) but I like fruit cake normally.
Red dragons are the best kind!
In May I didn't get much baking done so here's some pictures of striking bus drivers stopping me (and the rest of Irish commuters) from getting to work:
Walking picket line
There should be buses here!


The departure screens at the bus station lying about whether there would be buses
However that all got sorted out eventually (hooray) so now it is June and I made some more Magic cakes as there were more tournaments.
First of all I made a 'colour pie' for the five colours that there are in Magic.This is based on the fruit tarts you get in french patisseries (except I used a flan case instead of making a pastry one). I got the creme patissiere recipe from Nish Bakes blog. The creme patissiere is not too hard to make as long as you don't stop whisking until it's done! Mine was a bit runny in the end so perhaps I took it off the heat too soon.
Clockwise from top: green kiwi fruit, white banana, blackberries, red strawberries, and blueberries.
Then I made a chocolate cake as I'd been asked for one. I made my chocolate earl grey tea cake which i first made two years ago, and I iced it with buttercream and decorated it with mini marshmallows :
Marshmallows form the planeswalker symbol (again from Magic)
Oh and in case you didn't have enough pictures already, here are some of my friends baking cupcakes at my house. Well, eating cupcakes we had just baked.
Tasty cakes get eaten fast!
Very excited to have cakes!

March 29, 2013

Easter baking, and reading recipes properly

It's not that I haven't been baking lately, I just haven't written about it.
So here's a post about some buns and messy kitchens.

Today being Good Friday, I decided to make some hot cross buns. (Organised people bake them the day before, but I am far from organised at the moment).
Now I've made hot cross buns before, to the recipe my mum uses, but I'd found another recipe (it's here) I wanted to try out (though they're all quite similar!)
So, as I've made them before, I don't really read through the recipe properly just the ingredient list, and checked how long they take to rise (for hot cross buns are made with yeast). It says 2 hours, and I have the afternoon off, so i think 'that's fine i can mix the dough now and bake them later before tea'
So I'm working away, following the recipe, kneading the dough, when I think 'that's funny hot cross buns have dried fruit in and i haven't added those yet'. Check the recipe, and it turns out this one is 'double proved' which means you knead it, let it rise a while, then knead it again and let it rise more before you bake it. So they will actually need 4 hours to rise, not 2. This screws with my meal-timetable slightly (not normally a problem but I have family visiting so I need to be eating at a normal time)

For tea I've planned to have Good Friday Fish (aka smoked haddock) with another recipe I've not read properly. But I look at it and it seems ok... till I notice there's poached eggs in the middle. By this time I'm using about 3 different pans anyway so we decide to leave out the eggs. The recipe says to steam the fish but my 'tiered steamer' consists of a colander over a saucepan so we decide poaching will be quicker to cook the fish properly.
At which point I remember the buns need baking....
So while the fish is poaching and the potatoes are cooking, we split the nicely risen dough into buns (whoops, I should have done that before the second lot of proving. Not that it makes a huge difference but again failing to read words on a page). I put the buns into the oven so that they can bake while tea's being eaten, and check the recipe for how long they need to bake for...
Heat oven to 180C/160C fan/gas 4. Brush the buns with a little beaten egg. Mix the remaining flour with enough water to make a thick paste, then transfer to a piping bag fitted with a small round nozzle, or use a sandwich bag and snip off one corner. Use the paste to pipe crosses over the buns - this is easiest if you pipe in one big circle, then put a line across the middle of each bun. Bake for 25 mins until golden and cooked through.
Hmm... so the crosses were supposed to go on BEFORE I baked them? and the glaze too? whoops.

I blame my mum's recipe for the forgetting to glaze as her buns get glazed after they are baked (with sugar glaze not raw egg), but even hers put the crosses on before they get baked. As the buns had already gone into the oven, and dinner needed eating, I decided to used icing for the crosses instead and the sugar glaze.
Final buns look like this:
They aren't in a ring, either. But that was deliberate.Tasty tasty buns
Which isn't too bad for not having baked them  for three years or so, and failing to read the recipe right!

In more successful baking news, last week I made a Simnel cherry tart. I followed the recipe and it was lovely! (Kind of like a bakewell tart with a bit more marzipan). So it's not that I can't follow instructions! I forgot to take any pictures of that before it was eaten though.

December 04, 2011

Christmas gingerbread - 4/12/11

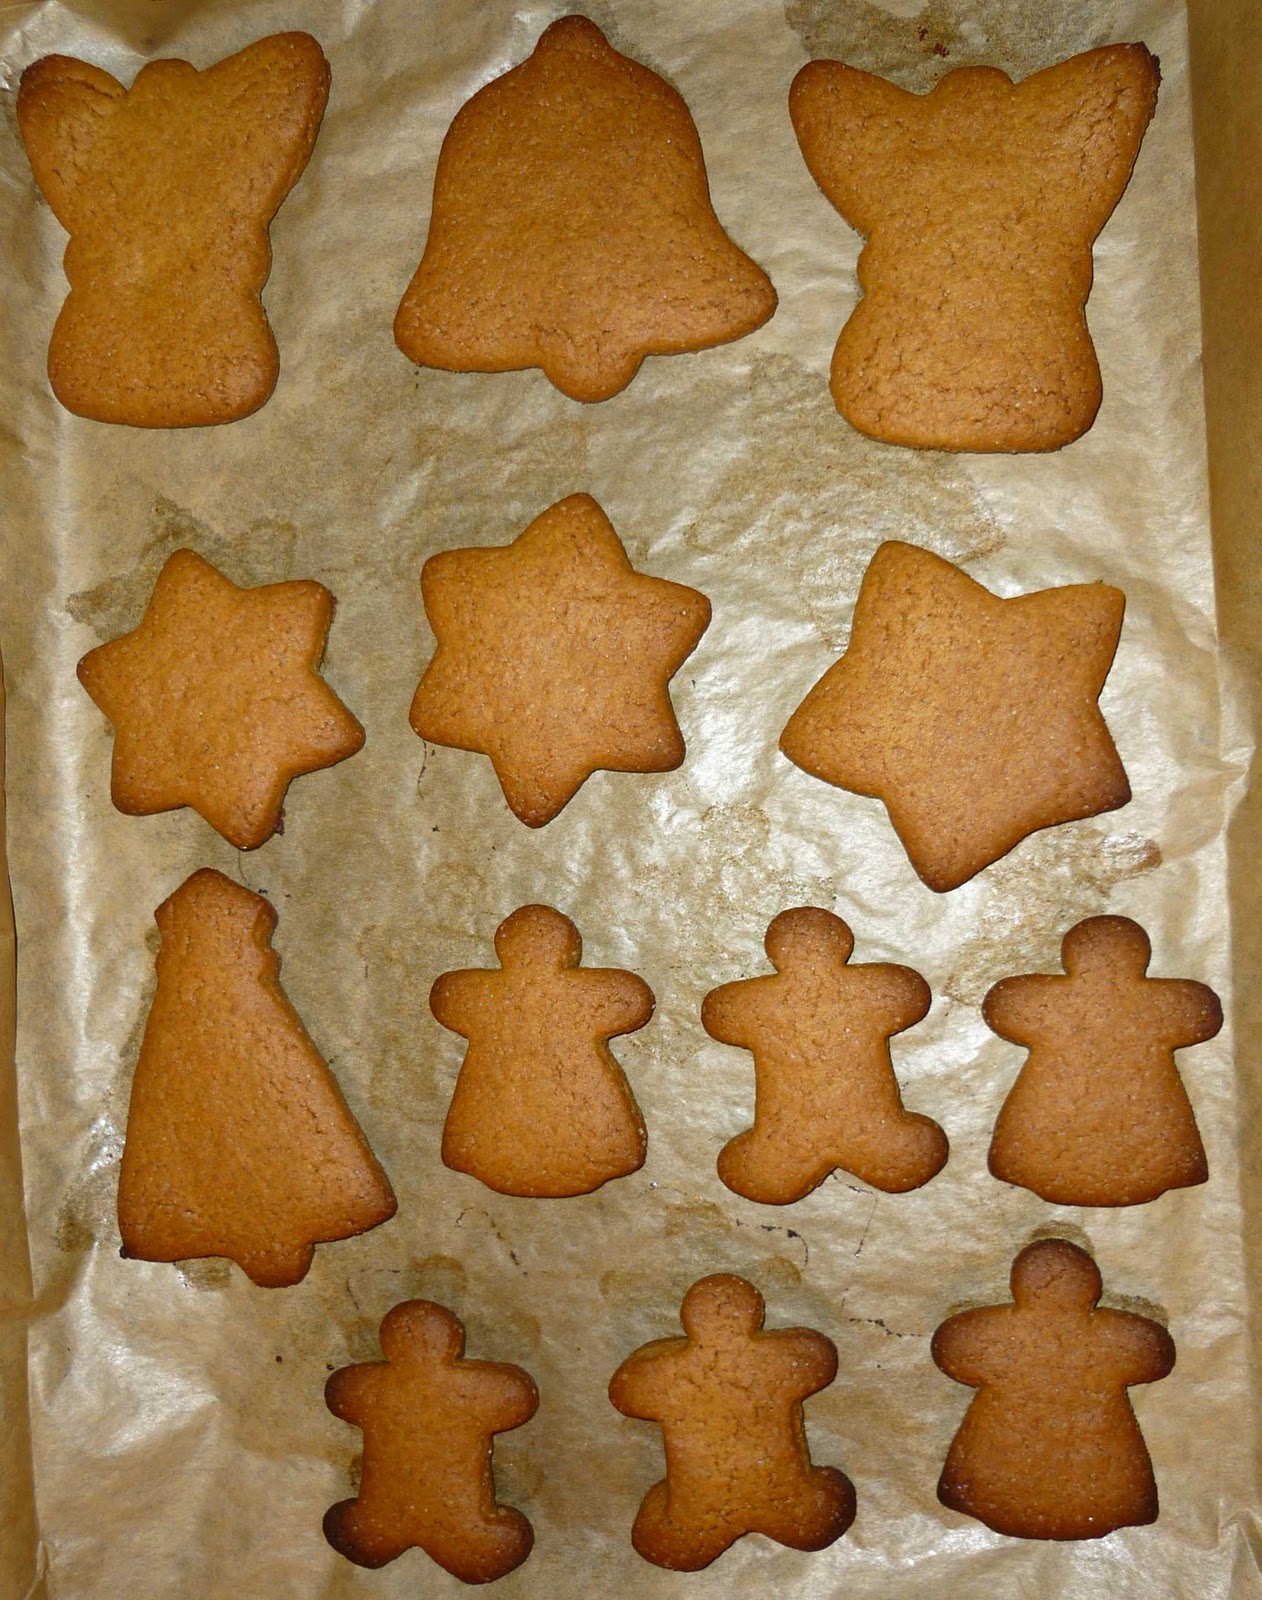
It's been a while since I posted! I have been making a few cakes, but not so many as I used to. I have a recipe for gingerbread houses, so I decided to try out the recipe to make some gingerbread shapes.
I made different shapes including angels, stars, trees and peopleSome of the first batch burnt, so I turned the next batch halfway through

If you want to make them yourself, the recipe is from Good Food magazine (I used a quarter of the quantities given to make this many shapes)

I should probably ice them before I eat them all, but they're so tasty...

September 25, 2011

House cake for a house warming - 24/9/11

My friends moved to a new flat recently, so i made them a cake for their house warming party. I decided to make a chocolate cake because I already had all the ingredients (and also chocolate cake is tasty!) so I made a loaf cake because the recipe for that is quite simple. Then I cut the top of the cake where it had risen to make a steeper roof, and coated the cake with chocolate ganache.
The doors and windows are made out of fondant icing because I didn't think to get any white chocolate for them!
Front of the house
Back & side of the house

The chimney is a piece of cake and the roof has mini marshmallows along it.

The ganache is quite simple to make:
100ml double cream
150g dark chocolate, broken/chopped into small squares (or dark chocolate chips)

Chop up the chocolate and place in a bowl
Bring the cream to the boil in a saucepan
Pour the hot cream over the chocolate and stir until it is smooth.
If the cream does not melt all the chocolate, you can melt the mixture over a pan of boiling water like normal chocolate, but the cream should be hot enough to melt it all on its own if you pour it over straight away.

The cake is a recipe for a two pound loaf tin, I made it in a tin 20cm by 10cm (8 inches by 4 inches). The ganache will cover a cake this big quite easily.

June 10, 2011

Caramel upside down pear cake - 10/6/11

I made one of these a while ago, but it got eaten before I managed to take a picture of it! Quite a few friends asked for the recipe, so here it is. It's from The Really Useful Cookbook, which lives up to its name.


4 large ripe pears (not too ripe or they fall apart)
150g golden caster sugar
125g butter, softened
120g brown sugar
2 eggs
125g self raising flour
pinch of ground ginger
23cm (9 inch) round cake tin


1. Preheat to oven to 180°C (Gas 4). Grease the tin and line the base with baking paper.
2. Peel the pears and cut two of the into quarters and then eighths, giving you 16 slices. Cut the remaining pears into 1cm dice.
3. Place the golden caster sugar and 3 tablespoons of water in a saucepan and bring to the boil over a medium heat, stirring to dissolve the sugar. Boil gently without stirring until it forms a golden caramel. Carefully pur the caramel into the base of the tin, swirling it to cover the paper. Arrange the pear slices on the caramel.
4. Beat the butter and brown sugar together. Whisk the eggs and add to the mixture. Sift in the flour and ginger and fold in to the mixture. Stir in the diced pears.
5. Spoon into the tin and smooth the top. Bake for 45-50 mins. Test with a skewer.
6. Cool in the tin for 5 minutes before turning out onto a serving plate.

I actually used dark brown sugar for the caramel as I didn't have any golden caster sugar. I've used white sugar before, I think the main difference that it makes is how dark the caramel is.
I use a springform cake tin (where the side detaches from the base) as I don't have another 9 inch tin. This makes it easier to get the cake out, but you need to line all of the tin not just the base, or the caramel will leak out!

June 05, 2011

Marzipan makes marzipan (and icing) - 1/6/11

I've been meaning to make my own marzipan and icing when the blocks I'd bought ran out, so for this cake I found some recipes. So far I've made the marzipan and put that on the cake, with a recipe I found here. It works quite well with my cake recipe, as the cake asked for lemon zest, almonds, and vanilla and almond essence, and the marzipan wants lemon juice, more almonds, and vanilla and almond essence!
One of the best bits about making this marzipan was eating the bits that were left over. I think it's the lemon juice that makes it so nice.
I thought I'd made enough to cover my cake, but I couldn't roll it as thin as I've been rolling the shop marzipan as it fell apart, so I only covered the top of the cake.
Here's my marzipanned cake and the recipe:
You can see where I've used marzipan at the bottom of the cake to fill in the gaps
Ingredients
200g ground almonds
120g caster sugar
120g icing sugar
1 egg yolk
1 whole egg
1 tsp lemon juice
3 drops vanilla essence
2 drops almond essence

1. Sift the caster sugar & icing sugar together. Add the ground almonds and stir well.
2. Beat the eggs and add to the mixture, add the lemon juice, vanilla and almond essences. Mix well.
3. Knead on a board with icing sugar until smooth.

That's it! I thought marzipan was much more complicated than that. Marzipan from the shop is cooked so it doesn't have raw egg in it, or you can get recipes which use liquid glucose or glycerine instead.
The amounts I've given should cover an eight inch square cake, I actually made half that amount as usually I don't use much marzipan.
Now for the sugarpaste (ready to roll/fondant icing).
I used the recipe from Beginner's Guide to Cake Decorating (available on Google Books here.) It's also quite simple. I used the egg white which was left over from making the marzipan, but again, if you don't want to use raw egg you can get dried egg white which you make up with water, or liquid egg white from the chiller section of the supermarket. There are also alternative recipes which use gelatine and glycerine instead of egg white.
The mix is quite crumbly and not sticking together at forst, but enough mixing and/or kneading and it comes out quite smooth. Here's mine wrapped in cling film:
Not a very interesting picture!
Next I'll ice the cake and see how my icing compares to the shop-bought stuff.

May 11, 2011

Floodwork flowers and leaves, and some cookies - 10/5/11

I've finally got around to doing some more decorations rather than just making tasty cake and eating it!
These are some flower and leaf decorations made by a technique called flooding or runout. Basically you draw some shapes on a piece of paper, cover that with baking or greaseproof paper (somethinig non-stick that you can still see the lines through), draw over the outline with stiff icing, then water it down and colour it to fill in the outlines. Colouring in in icing form, in fact. Sounds simple, but actually more difficult than it sounds if you misread the recipe as i did and put too much liquid into the icing! The end result looks pretty good though:
Flowers and leaves on a sheet of baking paper
The same shapes in different colours

Here's a quick recipe, and some things I would have found useful to know:
Recipe from Beginner's Guide to Cake Decorating.
Ingredients:
1 egg white
250g (9oz) icing sugar, sifted
3 tsp lemon juice (TEASPOONS not tablespoons)
food colourings

Equipment:
template drawn on paper (you can make up your own, or find one somewhere. I drew mine on the computer and printed it out so they were all alike)
baking paper
paper piping bags (if you don't know how to make them, there's a video tutorial here. Don't cut the tips off yet though.)
1mm piping tip
cocktail stick

  • Lightly beat the egg with a wooden spoon. GRADUALLY, add the icing sugar and beat until it is a smooth paste. Add 2 tsp lemon juice slowly until the mixture has a stiff piping consistency. Fill a piping bag fitted with a 1mm tip (a couple of teaspoons of icing should be plenty to make as many as I did) and cover the rest of the icing with cling film on its surface so it doesn't dry out.
  • Pipe over the outlines and leave them to dry. I taped the paper to the table so it didn't slip about.
  • When you have enough outlines, gradually add more lemon juice to the icing until it is easy to spread smoothly. If you want to colour the icing, divide it into smaller bowls or cups and add the colouring, mixing with a teaspoon or cocktail stick. Don't forget to cover the surface of the icing with cling film when you're not using it to keep the air out.
  • Fill a paper piping bag with the thinner icing before cutting off the tip, only cutting off a small amount of the tip so that the opening is 2mm or so across (you can always cut off more later if you need to). Gently flood the outlines with the coloured icing. I put a couple of drops of icing in and spread it gradually with a cocktail stick, but this is mainly because my icing was too runny to pipe properly.
  • Leave them to dry overnight and remove carefully once completely dry with a palette knife or by peeling the paper backwards from the shapes.
  • They should keep for up to a week if stored in an airtight container. I layered them on kitchen paper so that they could be kept safe.

And I used up my egg yolk by making tasty choc chip cookies. The recipe is from Cooking:a Commonsense Guide, but I don't have the metric equivalents as I generally bake in imperial measurements.
 5oz butter
1 1/2 oz brown sugar
3oz caster sugar
1 egg yolk
1 tsp vanilla essence
5oz self raising flour
3oz chocolate chips

Cream together the butter and sugar. Add the egg yolk and vanilla, then the flour. Mix to a dough. Add most of the choc chips. Make into small balls of about a teaspoonful each and place them on a baking sheet with lots of space between them. Push the remaining choc chips into the tops of the cookies. Bake at 180 C for 10-15 minutes.