A while ago my friends had a baby, and I made them a quilt as a present. Well now the baby is a bit bigger (she's still very small though!), they were having a baby-welcoming party (like a baby shower, but after the birth)
Obviously they've already had their present, but I was asked to make a tasty cake so I made a cake with the baby's name on it. It's a chocolate cake similar to the birthday cake I made in August, but with raspberry jam instead of cherry for the sandwich-joining.
For some reason the cake rose very unevenly in the oven but i managed to fill in the dips with jam and chocolate icing. The small lumpy bits on the icing are where I didn't quite melt the chocolate in the ganache because my cream wasn't hot enough. Ah well.
The flowers are chocolate floodwork, similar to the floodwork flowers I made here but made out of melted white and milk chocolate instead of runny icing. The white chocolate for the outlining went a bit lumpy so some of the flowers were not very good - these are the best ones! The milk chocolate melted much better so filling the flowers was easier than the outlines. I kept the flowers in the fridge until I was ready to attach them to the cake, so they wouldn't melt.
The name is iced directly onto the cake, I practised a couple of times on greasproof paper to get the letters the right size and I made small marks in the icing with a skewer to keep the writing even (the marks were covered up by the writing)
This blog is to show my progress in cake decorating. To see my cards and other crafts, please visit my craft blog.
Showing posts with label flowers. Show all posts
September 25, 2012
August 06, 2012
Birthday Cake - 30/3/12
I haven't made many cakes lately as I've been mainly concentrating on sewing, but it seems that I forgot to write a post about the cake I made from my mum's birthday in March.
It was a chocolate cake (because my mum loves chocolate!)
I was going to try to make lots of flowers as she is a florist, but I ran out of time so I settled for the ring of buds and writing 'mum' in daisies.
In the end she got two cakes as she made herself a battenburg too! They were both tasty!
It was a chocolate cake (because my mum loves chocolate!)
I was going to try to make lots of flowers as she is a florist, but I ran out of time so I settled for the ring of buds and writing 'mum' in daisies.
In the end she got two cakes as she made herself a battenburg too! They were both tasty!
September 16, 2011
Wedding cake flower spray - 8/9/11
So, in my previous post, I described the individual flowers I put in my wedding cake spray.
Before I'd started making them, I'd done some sketches to work out what I needed and how big the flowers should be.
So once I'd made up the stems of flowers, I had to make a cake-shaped box to help me arrange the spray properly. This was made up of various boxes and a block of oasis to stick the flower pick into (I'd got two big posy picks as well as some smaller picks, so that I could have a set for the cake and a set to transport the flowers with).
Then to arrange the flowers. I had two single calla lilies, two stems of lisianthus with leaves, two stems of freesias and five stems of spray carnations with rose leaves.
In the end, I only needed three stems of carnations so the other two went on top of the cake, the spray going from the bottom layer up the sides.
The final spray looked like this:
And here is a photo my friend took of the cake all assembled and ready for eating:
You can probably see that the main posy is actually in three separate picks because the lisianthus stems were too big to fit in with the rest of the flowers. What you can't see is where the icing cracked on one side because the picks were too close to the edge of the cake...
This cake is two layers of fruit and one layer of madeira, each layer is on a thick board (the middle madeira layer is actually on two boards as it was shorter than the fruit cakes!), with ribbon around the edge of each cake & board. The lower cakes have dowels in to support the upper layers. The top layer has pink hearts inlaid into the sugarpaste as well as the flowers.
Before I'd started making them, I'd done some sketches to work out what I needed and how big the flowers should be.
So once I'd made up the stems of flowers, I had to make a cake-shaped box to help me arrange the spray properly. This was made up of various boxes and a block of oasis to stick the flower pick into (I'd got two big posy picks as well as some smaller picks, so that I could have a set for the cake and a set to transport the flowers with).
Then to arrange the flowers. I had two single calla lilies, two stems of lisianthus with leaves, two stems of freesias and five stems of spray carnations with rose leaves.
| ![]() | ![]() | ![]() |
In the end, I only needed three stems of carnations so the other two went on top of the cake, the spray going from the bottom layer up the sides.
The final spray looked like this:
![]() |
| Yes, that is an icing sugar box posing as a cake! |
![]() |
| Tasty tasty cake! |
This cake is two layers of fruit and one layer of madeira, each layer is on a thick board (the middle madeira layer is actually on two boards as it was shorter than the fruit cakes!), with ribbon around the edge of each cake & board. The lower cakes have dowels in to support the upper layers. The top layer has pink hearts inlaid into the sugarpaste as well as the flowers.
September 05, 2011
Wedding cake flowers - 29/8/11 to 5/9/11
![]() |
| Calla, showing the curve of the petal |
First the favours which will be callas made out of sugarpaste, as in this post, but everyone is getting one each in the end as three hundred sugar callas is too many for me to make. I've done the sticks and the stamens for these (and I still haven't done a tutorial. Whoops.)
Then I decided what flowers I was going to put in the spray to go on the cake. These are made out of flower paste, which is less brittle than sugar paste (but also less tasty!). I decided on freesias, lisianthus, carnations, calla lilies and rose leaves as these will all be in the actual flowers as well.
I've been making these flowers for the past week, working for a few hours each day, and I finished making the individual flowers today. Then I need to make them up into stems, and then assemble the stems into a spray.
![]() |
| Individual freesia buds & flowers taped together into a spray |
The carnation tutorial I made is here, but instead of just folding a stamen I wrapped florists tape round a hooked wire to have a firmer base to start from. As I am making carnations which are white with pink tips, I also painted the edges of the petals with pink food colouring using a fine (no.1) paintbrush once the flowers had dried.
The callas I made on wires rather than wooden sticks so that I could shape the wires in the spray. I used three gauge 18 wires, taped together with flower tape all down the length. This also made the wires green as my gauge 18 wires are white! I found that the inside of a kitchen roll is good to rest them on while they dry, as they curve properly at the back of the flower. A large rolling pin would be equally good.
![]() |
| Spray of lisianthus with heart-shaped leaves |
As for the lisianthus (latin name is Eustoma), which look like this in real life, I found a rather complicated tutorial here, which I followed to make the stamens etc and then simplified. Instead of wiring each petal separately, I used a gauge 18 wire for the stem and then made the flower in a similar method to the first flowers I made (remember these?), wrapping the petals around the stem before glueing the final one. This worked for some of them, but for others I hadn't made a big enough lump for the ovary so i had to add extra sugarpaste to attach the petals to. This is working so far. The lisianthus are white with purple edging, so I painted the edges of each petal with purple food colouring once the flowers had dried. This helps to highlight each separate petal, though it takes a while as you have to keep it neat!
As a guide, this is what I have made and how long roughly each bit took:
![]() |
| Spray carnations with rose leaves |
Leaves - 18 rose leaves (some big, some small), 16 heart-shaped lisianthus leaves. These took two or three hours.
Carnations - 10 individual flowers (to be made into 5 stems with two flowers on each). These took about two hours to make, and another two hours to paint the edges of the petals.
Callas - 2 individual calla lilies, these didn't take very long at all but I had to let the stamens dry overnight so probably two half-hour slots would make these.
Lisianthus - these took the longest, as I hadn't made these before. Making the stamens was quite fiddly (though it could probably be simplified to make it slightly less botanically accurate). I think these took at least 4 hours, with another hour to paint the edges of the petals.
Now I've updated with pictures of the flowers, you can have more of an idea of what I've done.
August 19, 2011
Cake on a plane - 1/8/11
I was going to a funeral, and I'm not very good at arranging flowers so I thought that I'd make a cake with a bunch of flowers on top. So I looked online for pictures of flowers that I could use as a base, and I found this page of colouring sheets. I then simplified the picture a bit more using paint.net, and drew over it to check I could do it properly:
I made two of the same design in case one got broken. The outlines I made the night before, and then filled in with more runny icing (the same method as the floodwork flowers I made a few months ago).
The cake is fruit cake iced with marzipan and sugarpaste. I added a yellow ribbon around the base as well. This is it after icing:
It was an eight inch square cake on an eight inch board, so I put it in an eight inch box and took it on a plane to the funeral. It survived very well under the seat in front of me! The edges of the icing cracked a little where they were squashed by the box but mostly it was fine.
The decoration I took on the greaseproof paper as well, and that also survived. However when I tried to take the decoration off the paper, it cracked into many tiny pieces. I think despite my simplifying, it was still too complicated a design for this method. I probably should have iced it onto a plaque of icing so that it didn't need peeling off the paper, or just cut around the design on the paper!
Better luck next time.
![]() |
| Coloured in version |
![]() |
| Final outline shape |
I made two of the same design in case one got broken. The outlines I made the night before, and then filled in with more runny icing (the same method as the floodwork flowers I made a few months ago).
| Outlines |
| Finished designs |
The cake is fruit cake iced with marzipan and sugarpaste. I added a yellow ribbon around the base as well. This is it after icing:
It was an eight inch square cake on an eight inch board, so I put it in an eight inch box and took it on a plane to the funeral. It survived very well under the seat in front of me! The edges of the icing cracked a little where they were squashed by the box but mostly it was fine.
The decoration I took on the greaseproof paper as well, and that also survived. However when I tried to take the decoration off the paper, it cracked into many tiny pieces. I think despite my simplifying, it was still too complicated a design for this method. I probably should have iced it onto a plaque of icing so that it didn't need peeling off the paper, or just cut around the design on the paper!
Better luck next time.
June 18, 2011
Wedding favour - 16/6/11
I decided to see if I could make some wedding favours which were sugar flowers, to show off my flower-making and also because I don't like sugared almonds, the traditional favour.
As the main flower at the wedding will be calla lilies, I made some and then tried to arrange them in a pretty way. They are doubling up as place names.
I was originally going to do just one flower each, but that didn't look very good so I made a little bunch of three. This does mean I'm going to have to make three times as many flowers, but never mind.
The stem is made out of half a wooden kebab stick painted with green food colouring. I made the flowers out of white paste and then painted them afterwards, but colouring first would probably give a better colour.
They are similar to the calla lilies I made before, but I bought a proper cutter so that I don't have to make the shape each time. The stamens are about an inch long and the petal is about 2 1/2 inches long by 1 1/2 inches wide. If you didn't want to buy a special cutter, you could use a similar sized leaf cutter and cut the stem end off.
I'll take photos when I make the next batch and do a tutorial.
(Cross-posted to Marzipan's Crafts)
As the main flower at the wedding will be calla lilies, I made some and then tried to arrange them in a pretty way. They are doubling up as place names.
I was originally going to do just one flower each, but that didn't look very good so I made a little bunch of three. This does mean I'm going to have to make three times as many flowers, but never mind.
The stem is made out of half a wooden kebab stick painted with green food colouring. I made the flowers out of white paste and then painted them afterwards, but colouring first would probably give a better colour.
They are similar to the calla lilies I made before, but I bought a proper cutter so that I don't have to make the shape each time. The stamens are about an inch long and the petal is about 2 1/2 inches long by 1 1/2 inches wide. If you didn't want to buy a special cutter, you could use a similar sized leaf cutter and cut the stem end off.
I'll take photos when I make the next batch and do a tutorial.
(Cross-posted to Marzipan's Crafts)
June 08, 2011
Cake iced with home made icing - 3/6/11
So, after I'd made my icing from scratch, I attempted to decorate the cake with it. I had quite a lot of problems rolling out the icing, I'm not sure whether that was because it was different icing, or because I was trying to roll out a bigger piece (this cake is 8 inches square, and before I'd only done 6 inch square cakes). It was also a hot day which i think made the icing stickier.
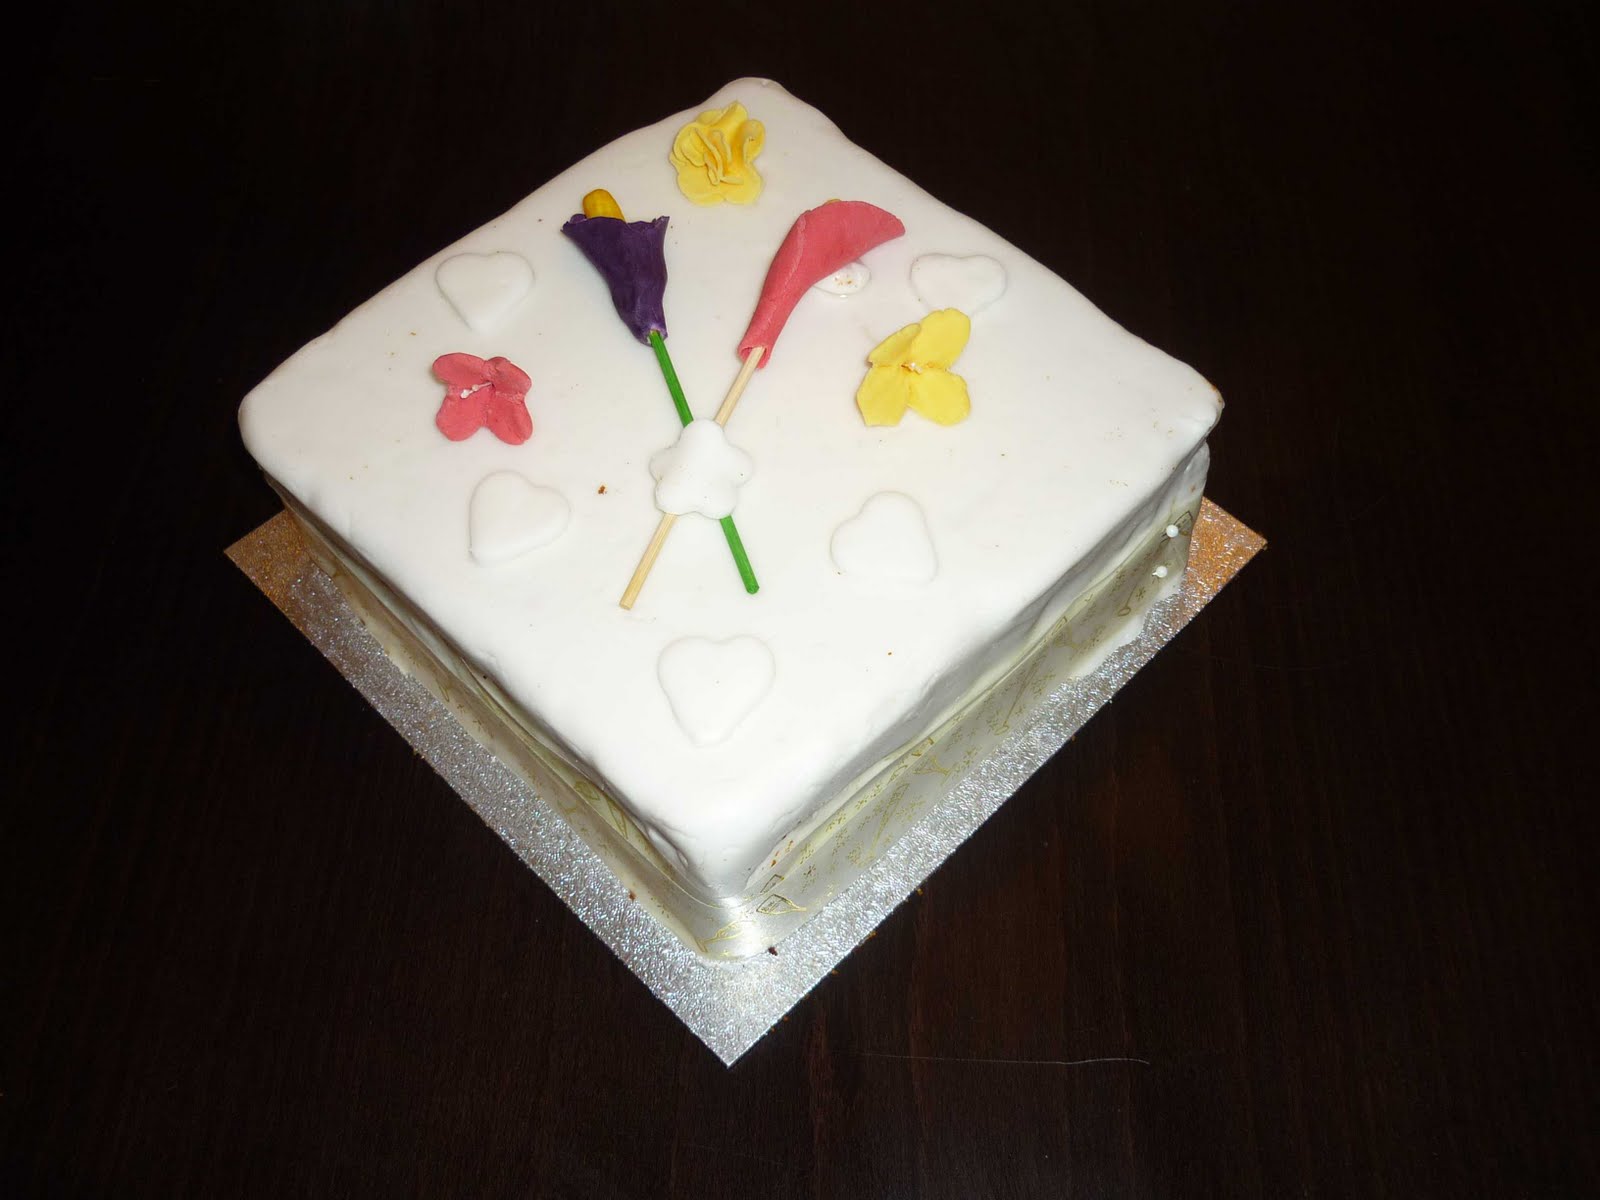
In the end, with the aid of some margarine on the surface instead of icing sugar, it got rolled out and attached to the cake. I was using some of the flowers I'd made a while ago for decorations, as well as a wide ribbon around the sides.
It was supposed to be an anniversary cake for our visitors, although their anniversary is actually the 2nd of June not the 3rd. As I ran out of time to make new decorations, it ended up being a bit of a random cake. But it tastes good!
There is still about a quarter of the cake left in my kitchen. It tastes good but is quite crumbly when you cut it.
In the end, with the aid of some margarine on the surface instead of icing sugar, it got rolled out and attached to the cake. I was using some of the flowers I'd made a while ago for decorations, as well as a wide ribbon around the sides.
| There are a few crumbs in the icing, as the marzipan was only on the top of the cake not the sides. |
| View from the front of the cake |
| Cake from the back. The ribbon is hiding the messy sides of the cake! |
There is still about a quarter of the cake left in my kitchen. It tastes good but is quite crumbly when you cut it.
May 14, 2011
Floodwork flower cake - 14/5/11
So today the cake was ready for the flowers I made the other day to be attached! Quite a few of the flowers had broken in their box or as I was arranging them but hopefully as I get better at making them I'll break less.
Each side has one flower and two leaves on it, and the top has two flowers on it. You might notice that the flowers I made with thinner petals don't appear on this cake - this is because the petals are too thin and nearly all of these flowers have broken. The best design for these flowers seems to be a more uninterrupted shape like the ones with bigger petals. The leaves have also survived well.
The floodwork has given me a liking for piping, so I also did some writing with icing left over from sticking the runouts to the cake. I practiced first on some baking paper to make sure that the letters would be the right size to fit on the cake. The words 'Le Chéile' are Irish for 'Together' - it is the name of the group I made the cake for.
![]() |
| Front view |
![]() |
| Back view |
Each side has one flower and two leaves on it, and the top has two flowers on it. You might notice that the flowers I made with thinner petals don't appear on this cake - this is because the petals are too thin and nearly all of these flowers have broken. The best design for these flowers seems to be a more uninterrupted shape like the ones with bigger petals. The leaves have also survived well.
![]() |
| Close up of one side |
![]() |
| Practice piece on baking paper |
![]() |
| Writing on the cake, copying the lettering from the paper |
______________________________
I had to put quite a lot of icing in the bag so that I could write neatly, so I used it up by making some more flower outlines for more runouts.![]() |
| The outlines before being filled with colours |
May 11, 2011
Floodwork flowers and leaves, and some cookies - 10/5/11
I've finally got around to doing some more decorations rather than just making tasty cake and eating it!
These are some flower and leaf decorations made by a technique called flooding or runout. Basically you draw some shapes on a piece of paper, cover that with baking or greaseproof paper (somethinig non-stick that you can still see the lines through), draw over the outline with stiff icing, then water it down and colour it to fill in the outlines. Colouring in in icing form, in fact. Sounds simple, but actually more difficult than it sounds if you misread the recipe as i did and put too much liquid into the icing! The end result looks pretty good though:
Here's a quick recipe, and some things I would have found useful to know:
Recipe from Beginner's Guide to Cake Decorating.
Ingredients:
1 egg white
250g (9oz) icing sugar, sifted
3 tsp lemon juice (TEASPOONS not tablespoons)
food colourings
Equipment:
template drawn on paper (you can make up your own, or find one somewhere. I drew mine on the computer and printed it out so they were all alike)
baking paper
paper piping bags (if you don't know how to make them, there's a video tutorial here. Don't cut the tips off yet though.)
1mm piping tip
cocktail stick
And I used up my egg yolk by making tasty choc chip cookies. The recipe is from Cooking:a Commonsense Guide, but I don't have the metric equivalents as I generally bake in imperial measurements.
5oz butter
1 1/2 oz brown sugar
3oz caster sugar
1 egg yolk
1 tsp vanilla essence
5oz self raising flour
3oz chocolate chips
Cream together the butter and sugar. Add the egg yolk and vanilla, then the flour. Mix to a dough. Add most of the choc chips. Make into small balls of about a teaspoonful each and place them on a baking sheet with lots of space between them. Push the remaining choc chips into the tops of the cookies. Bake at 180 C for 10-15 minutes.
These are some flower and leaf decorations made by a technique called flooding or runout. Basically you draw some shapes on a piece of paper, cover that with baking or greaseproof paper (somethinig non-stick that you can still see the lines through), draw over the outline with stiff icing, then water it down and colour it to fill in the outlines. Colouring in in icing form, in fact. Sounds simple, but actually more difficult than it sounds if you misread the recipe as i did and put too much liquid into the icing! The end result looks pretty good though:
| Flowers and leaves on a sheet of baking paper |
| The same shapes in different colours |
Here's a quick recipe, and some things I would have found useful to know:
Recipe from Beginner's Guide to Cake Decorating.
Ingredients:
1 egg white
250g (9oz) icing sugar, sifted
3 tsp lemon juice (TEASPOONS not tablespoons)
food colourings
Equipment:
template drawn on paper (you can make up your own, or find one somewhere. I drew mine on the computer and printed it out so they were all alike)
baking paper
paper piping bags (if you don't know how to make them, there's a video tutorial here. Don't cut the tips off yet though.)
1mm piping tip
cocktail stick
- Lightly beat the egg with a wooden spoon. GRADUALLY, add the icing sugar and beat until it is a smooth paste. Add 2 tsp lemon juice slowly until the mixture has a stiff piping consistency. Fill a piping bag fitted with a 1mm tip (a couple of teaspoons of icing should be plenty to make as many as I did) and cover the rest of the icing with cling film on its surface so it doesn't dry out.
- Pipe over the outlines and leave them to dry. I taped the paper to the table so it didn't slip about.
- When you have enough outlines, gradually add more lemon juice to the icing until it is easy to spread smoothly. If you want to colour the icing, divide it into smaller bowls or cups and add the colouring, mixing with a teaspoon or cocktail stick. Don't forget to cover the surface of the icing with cling film when you're not using it to keep the air out.
- Fill a paper piping bag with the thinner icing before cutting off the tip, only cutting off a small amount of the tip so that the opening is 2mm or so across (you can always cut off more later if you need to). Gently flood the outlines with the coloured icing. I put a couple of drops of icing in and spread it gradually with a cocktail stick, but this is mainly because my icing was too runny to pipe properly.
- Leave them to dry overnight and remove carefully once completely dry with a palette knife or by peeling the paper backwards from the shapes.
- They should keep for up to a week if stored in an airtight container. I layered them on kitchen paper so that they could be kept safe.
And I used up my egg yolk by making tasty choc chip cookies. The recipe is from Cooking:a Commonsense Guide, but I don't have the metric equivalents as I generally bake in imperial measurements.
5oz butter
1 1/2 oz brown sugar
3oz caster sugar
1 egg yolk
1 tsp vanilla essence
5oz self raising flour
3oz chocolate chips
Cream together the butter and sugar. Add the egg yolk and vanilla, then the flour. Mix to a dough. Add most of the choc chips. Make into small balls of about a teaspoonful each and place them on a baking sheet with lots of space between them. Push the remaining choc chips into the tops of the cookies. Bake at 180 C for 10-15 minutes.
April 01, 2011
Step by step: carnation - 1/4/11
Following from my freesia step by step, here's how I made a spray carnation. Again, it's based on the method in Sugarcraft Flowers by Claire Webb.
Carnation
You need:
Sugarpaste (fondant icing) or flower paste
Colouring - the colour you want the flowers to be, and green
Small blossom/flower cutter approx 2cm diameter
Cocktail stick or wooden kebab skewer
Edible glue
Artificial stamens or thin wire approx. 5cm long
Small knife (a craft knife would be good)
Small paintbrush
To attach the flower to a stem you will need:
Thicker wire for the stem
Florists tape or ribbon approx 7mm wide
You may also find pliers useful to bend the thick wire, and tweezers to move the petals into place.
Flower
1. Roll a piece of sugarpaste (either the colour of the flower or white to colour later) and cut out three flower shapes with a cutter. Fold a stamen in half and set aside. Cut slightly down between each petal to divide them more.
2. Using the cocktail stick, roll out one flower shape thinner and frill the edges if you like. Mark a hole in the centre. Apply edible glue to half of the centre leaving the petals free to be shaped later.
3. Slide the flower onto the stamen and fold in half. apply more glue and fold in half again. You may find tweezers useful to separate the small petals and shape the flower head slightly.
4. Roll out another flower shape as above and mark a hole in the centre. Apply edible glue to the centre for this flower and slide up to attach to the first.
5. Repeat step 4 for the final flower, making sure that the petals go between each other to give the right flower shape. Support it while it dries.
Assembly
Use the fold in the stamen to thread onto a piece of wire with a hook in the end. Twist this around to secure and wrap florists tape or ribbon around the wire to hold it firm. You could also add a calyx to the bottom of the flower before assembly to make it more realistic, or paint it on. Each flower should be on a separate small stem which combine to make the spray.
Carnation
You need:
Sugarpaste (fondant icing) or flower paste
Colouring - the colour you want the flowers to be, and green
Small blossom/flower cutter approx 2cm diameter
Cocktail stick or wooden kebab skewer
Edible glue
Artificial stamens or thin wire approx. 5cm long
Small knife (a craft knife would be good)
Small paintbrush
To attach the flower to a stem you will need:
Thicker wire for the stem
Florists tape or ribbon approx 7mm wide
You may also find pliers useful to bend the thick wire, and tweezers to move the petals into place.
Flower
1. Roll a piece of sugarpaste (either the colour of the flower or white to colour later) and cut out three flower shapes with a cutter. Fold a stamen in half and set aside. Cut slightly down between each petal to divide them more.
2. Using the cocktail stick, roll out one flower shape thinner and frill the edges if you like. Mark a hole in the centre. Apply edible glue to half of the centre leaving the petals free to be shaped later.
3. Slide the flower onto the stamen and fold in half. apply more glue and fold in half again. You may find tweezers useful to separate the small petals and shape the flower head slightly.
4. Roll out another flower shape as above and mark a hole in the centre. Apply edible glue to the centre for this flower and slide up to attach to the first.
5. Repeat step 4 for the final flower, making sure that the petals go between each other to give the right flower shape. Support it while it dries.
| Step 1 |
| Step 2 |
| Step 3 |
| Step 4 |
| Step 5 |
Assembly
Use the fold in the stamen to thread onto a piece of wire with a hook in the end. Twist this around to secure and wrap florists tape or ribbon around the wire to hold it firm. You could also add a calyx to the bottom of the flower before assembly to make it more realistic, or paint it on. Each flower should be on a separate small stem which combine to make the spray.
Step by step: freesia - 1/4/11
So today I was finishing my freesias, so I've done a little step by step for freesias. Mine aren't perfect yet but I thought I'd try to show how you don't always need to buy expensive cutters etc for each different flower.
This is adapted from the instructions in Sugarcraft Flowers by Claire Webb.
Freesia
You need:
Sugarpaste (fondant icing) or flower paste
Colouring - the colour you want the flowers to be, and green
Small leaf or petal cutter approx 3cm long, 2cm wide
Cocktail stick or wooden kebab skewer
Edible glue
Artificial stamens or thin wire approx. 5cm long
Small knife (a craft knife would be good)
Thicker wire for the stem
Florists tape or ribbon approx 7mm wide
You may also find pliers useful to bend the thick wire, and tweezers to move the petals into place.
Flowers
1. Roll a piece of sugarpaste (either the colour of the flower or white to colour later) and cut out two teardrop shapes with a leaf or petal cutter. Fold two stamens in half and set those aside. It may be easier to handle the flowers later if you add another wire to the folded end of the stamens at this point.
2. Mark on the petal shape to divide it into three smaller petals and cut into the required shape.
3. Using a cocktail stick or a kebab skewer, roll out each small petal more thinly and frill the edges.
4. Spread edible glue a quarter of the way up the petal and wrap the petal around the folded stamens, leaving the fold showing out of the bottom of the petal.
5. Repeat steps 3-4 with the second petal, making sure that the mini petals in the two layers go between each other (so you can see all six.)
6. Use the folded stamens to hang from a wire to dry. be careful handling these flowers as they are quite brittle and delicate.
7. Make as many as you need for one stem of freesia (about 3-4 flowers should be enough). Shape the calyxes from a small cone of green sugarpaste, the broad end hollowed out with a cocktail stick and two cuts in the sides of the cone. Slide these carefully onto the flowers. (Alternatively, you could paint the bottom end of the flowers green with food colouring.)
Buds
8. Cut a stamen in half (or cut a piece of wire about 1 inch long). Shape a small pea-sized piece of green paste into a teardrop shape and insert the wire into the thin end of the teardrop. You can fold the wire in half and insert both ends into the paste to make it easier to hang up the bud to dry.
9. Make as many buds as you need (2 or 3 for one stem of freesia) and leave to dry. Attach one bud to a thicker wire by making a hook in the end of the thick wire and hanging the bud at the very end. The other buds can be hung freely on the wire for now.
Assembly
10. Try out the spacing of the buds and flowers on your wire, then remove them all except the first bud at the far end.
11. Attach the florist tape or ribbon to the end of the wire and wrap along until you come to the place for the next bud. Slide the bud along the wire and continue wrapping. Add all the buds and flowers in this way. It may be easier if you have someone to help you hold the wire or ribbon to make sure the wrapping is neat and flat. Make sure the wrapping is taut so that the flowers don't shift about too much. You can dot edible glue along the wire to hold the ribbon/flowers in place if you want. When you have attached all the flowers, bend the stem wire at a right angle to imitate a freesia stem. Continue wrapping it or tie off the ribbon.
Next: carnations
This is adapted from the instructions in Sugarcraft Flowers by Claire Webb.
Freesia
You need:
Sugarpaste (fondant icing) or flower paste
Colouring - the colour you want the flowers to be, and green
Small leaf or petal cutter approx 3cm long, 2cm wide
Cocktail stick or wooden kebab skewer
Edible glue
Artificial stamens or thin wire approx. 5cm long
Small knife (a craft knife would be good)
Thicker wire for the stem
Florists tape or ribbon approx 7mm wide
You may also find pliers useful to bend the thick wire, and tweezers to move the petals into place.
Flowers
1. Roll a piece of sugarpaste (either the colour of the flower or white to colour later) and cut out two teardrop shapes with a leaf or petal cutter. Fold two stamens in half and set those aside. It may be easier to handle the flowers later if you add another wire to the folded end of the stamens at this point.
2. Mark on the petal shape to divide it into three smaller petals and cut into the required shape.
3. Using a cocktail stick or a kebab skewer, roll out each small petal more thinly and frill the edges.
4. Spread edible glue a quarter of the way up the petal and wrap the petal around the folded stamens, leaving the fold showing out of the bottom of the petal.
5. Repeat steps 3-4 with the second petal, making sure that the mini petals in the two layers go between each other (so you can see all six.)
6. Use the folded stamens to hang from a wire to dry. be careful handling these flowers as they are quite brittle and delicate.
7. Make as many as you need for one stem of freesia (about 3-4 flowers should be enough). Shape the calyxes from a small cone of green sugarpaste, the broad end hollowed out with a cocktail stick and two cuts in the sides of the cone. Slide these carefully onto the flowers. (Alternatively, you could paint the bottom end of the flowers green with food colouring.)
| Step 1 |
| Step 2 |
| Step 3 |
| Step 4 |
| Step 5 |
| Step 6 |
| Step 7 |
Buds
8. Cut a stamen in half (or cut a piece of wire about 1 inch long). Shape a small pea-sized piece of green paste into a teardrop shape and insert the wire into the thin end of the teardrop. You can fold the wire in half and insert both ends into the paste to make it easier to hang up the bud to dry.
9. Make as many buds as you need (2 or 3 for one stem of freesia) and leave to dry. Attach one bud to a thicker wire by making a hook in the end of the thick wire and hanging the bud at the very end. The other buds can be hung freely on the wire for now.
| Step 8 |
| Step 9 |
| Step 10 |
| Step 11 |
10. Try out the spacing of the buds and flowers on your wire, then remove them all except the first bud at the far end.
11. Attach the florist tape or ribbon to the end of the wire and wrap along until you come to the place for the next bud. Slide the bud along the wire and continue wrapping. Add all the buds and flowers in this way. It may be easier if you have someone to help you hold the wire or ribbon to make sure the wrapping is neat and flat. Make sure the wrapping is taut so that the flowers don't shift about too much. You can dot edible glue along the wire to hold the ribbon/flowers in place if you want. When you have attached all the flowers, bend the stem wire at a right angle to imitate a freesia stem. Continue wrapping it or tie off the ribbon.
Next: carnations
Subscribe to:
Posts (Atom)